How to install an AI chatbot on WordPress
This guide walks through the fastest way to add Aube AI to a WordPress site. The setup does not require theme edits or custom code.

Setup checklist
- Plugin is installed and activated
- Widget token is saved in WordPress
- WooCommerce REST API keys are created if you need product or order sync
- Knowledge base has your key policies and FAQs
- Widget appears on the public site
- Test conversation appears in the Aube AI dashboard
Create your Aube AI WordPress account
Open the WordPress signup page, create an account, and keep the dashboard open. The dashboard is where you manage the widget, knowledge base, conversations, and billing.
Download and upload the plugin
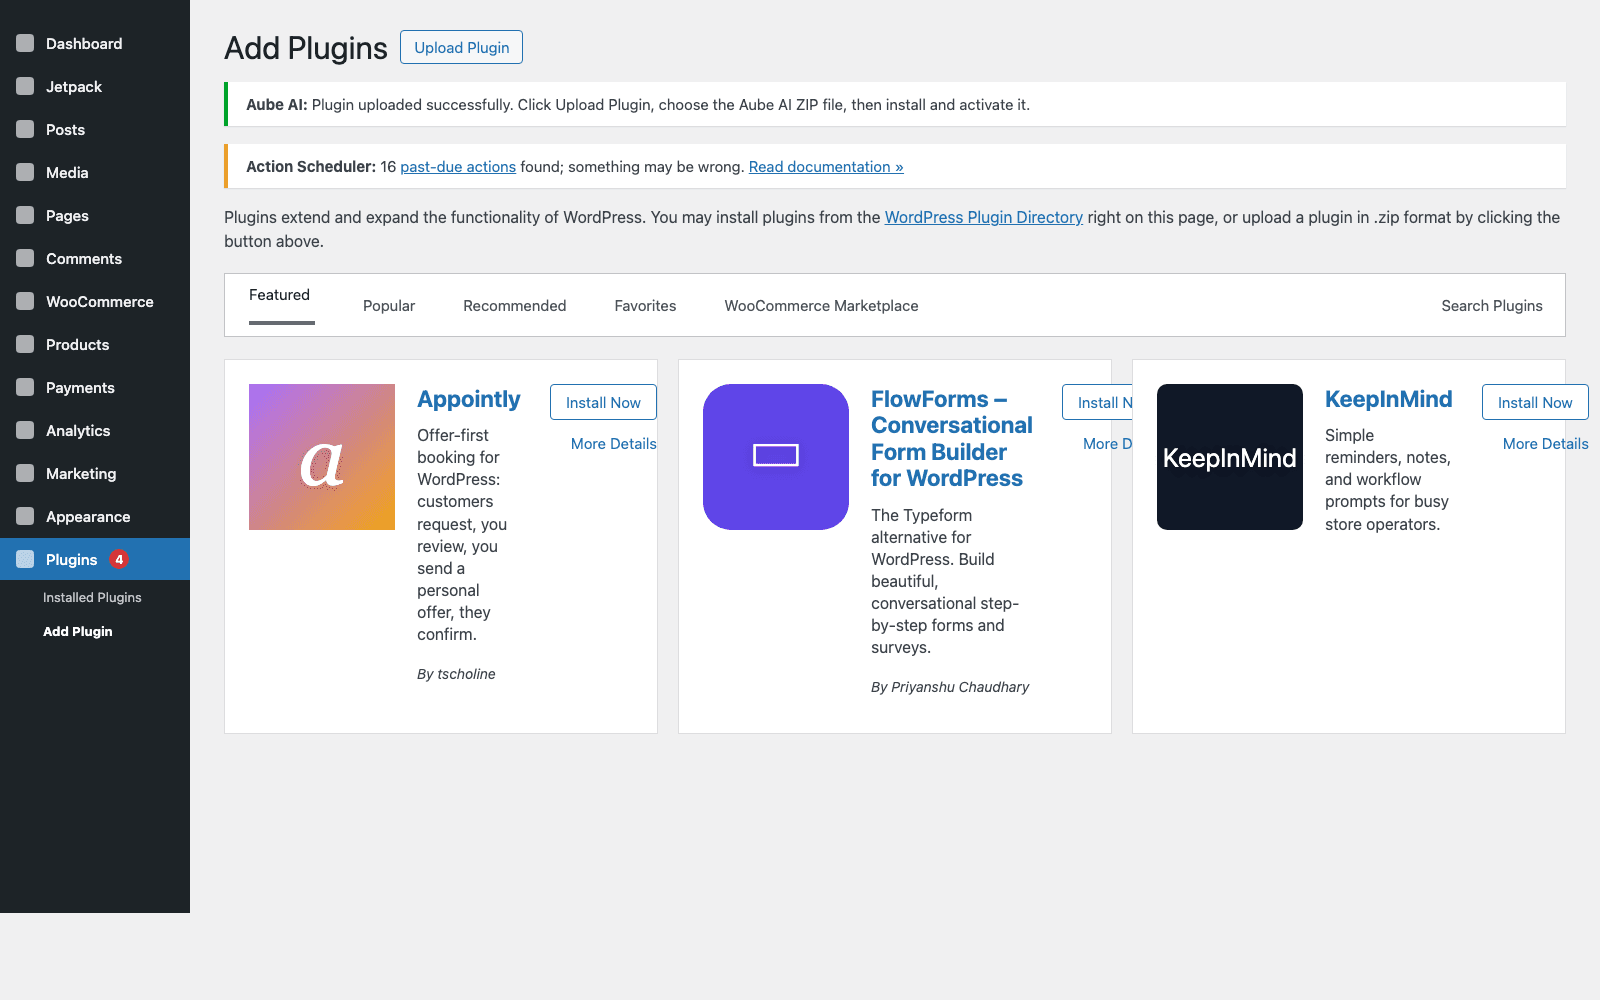
Download the Aube AI plugin ZIP, then go to WordPress Admin > Plugins > Add New Plugin > Upload Plugin. Choose the ZIP file without unzipping it, install it, and click Activate Plugin when WordPress finishes.
Connect the plugin to your dashboard
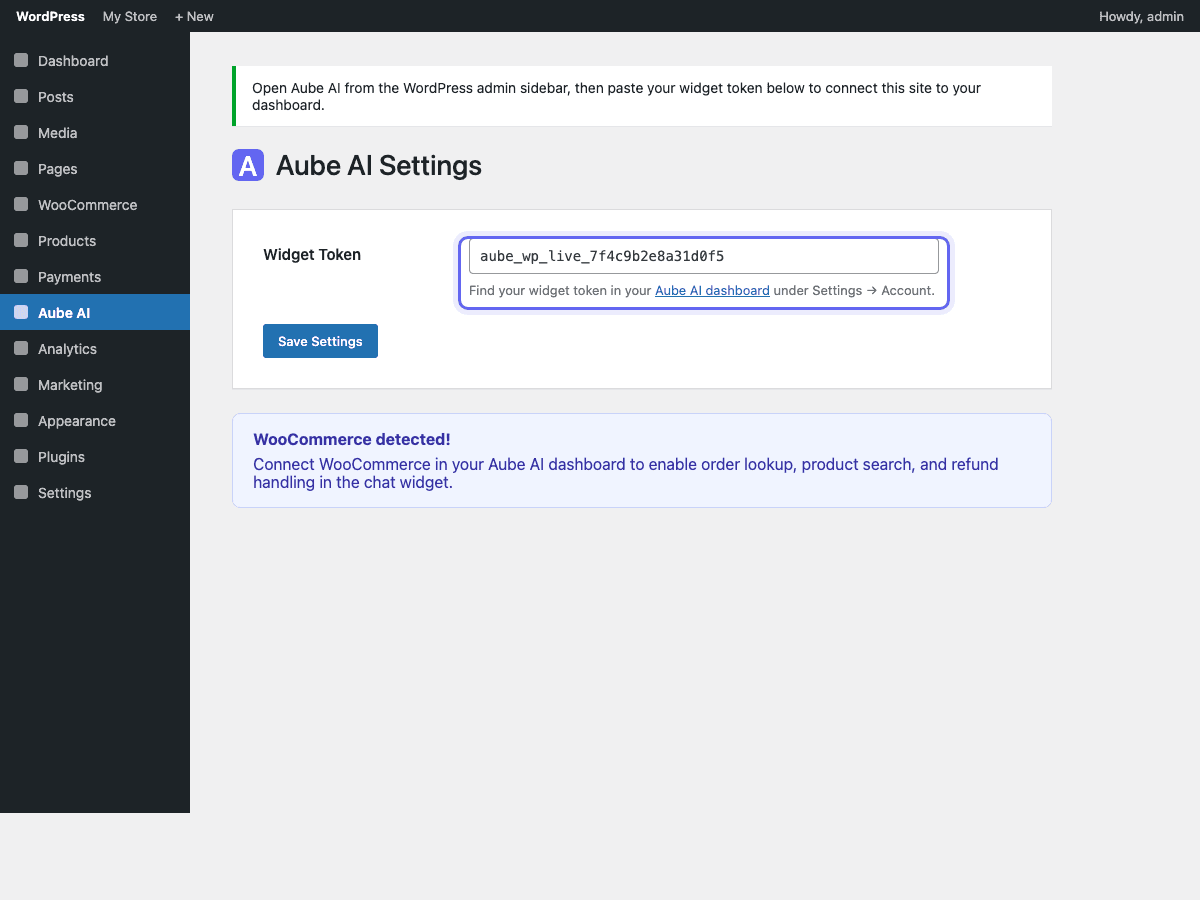
In WordPress Admin, open Aube AI from the left sidebar. Paste the widget token from your Aube AI dashboard into the Widget Token field, then click Save Settings so the site can load your chat widget. You can also open this screen directly at /wp-admin/admin.php?page=aube-ai.
Optional: generate WooCommerce API keys
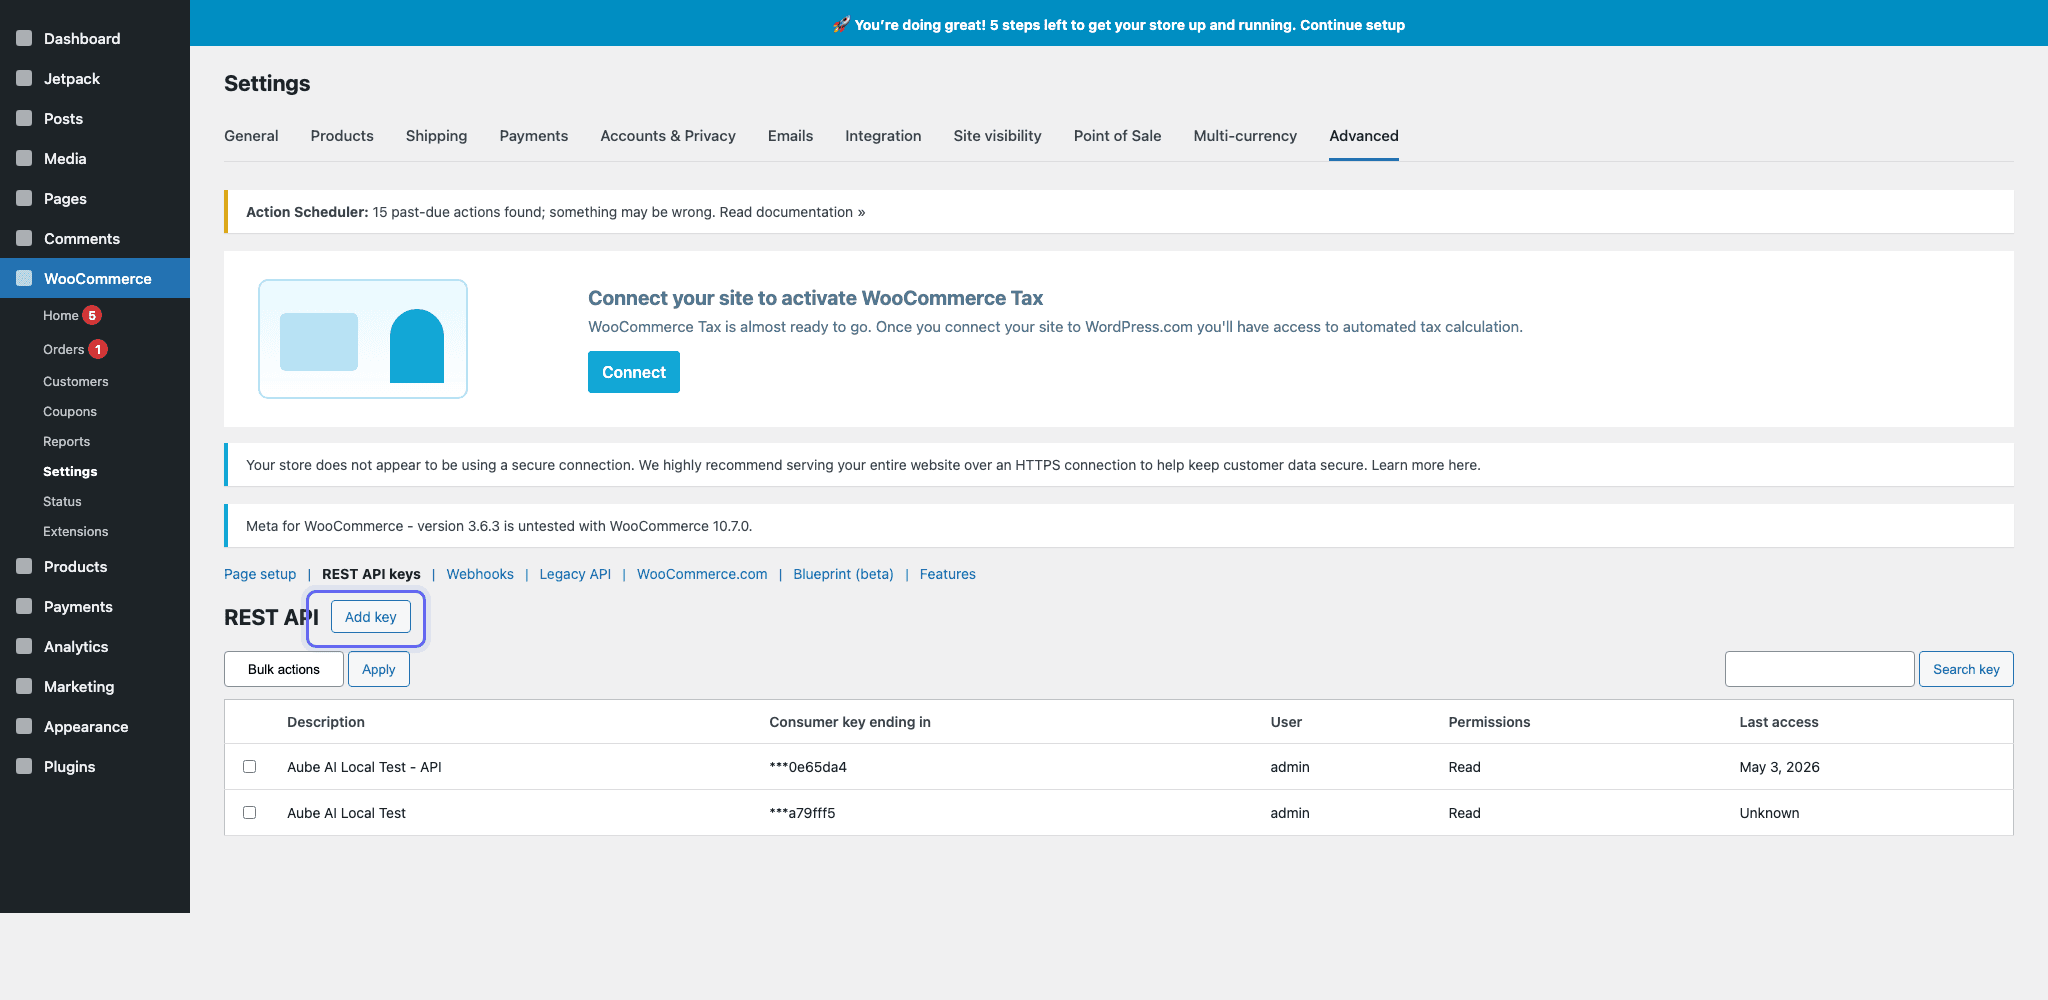
If you installed the plugin manually and want Aube AI to sync WooCommerce products, orders, and store content, go to WooCommerce > Settings > Advanced > REST API keys and click Add key. Create a key for the admin user and choose Read permissions for catalog and order lookup.
Copy the WooCommerce key and secret
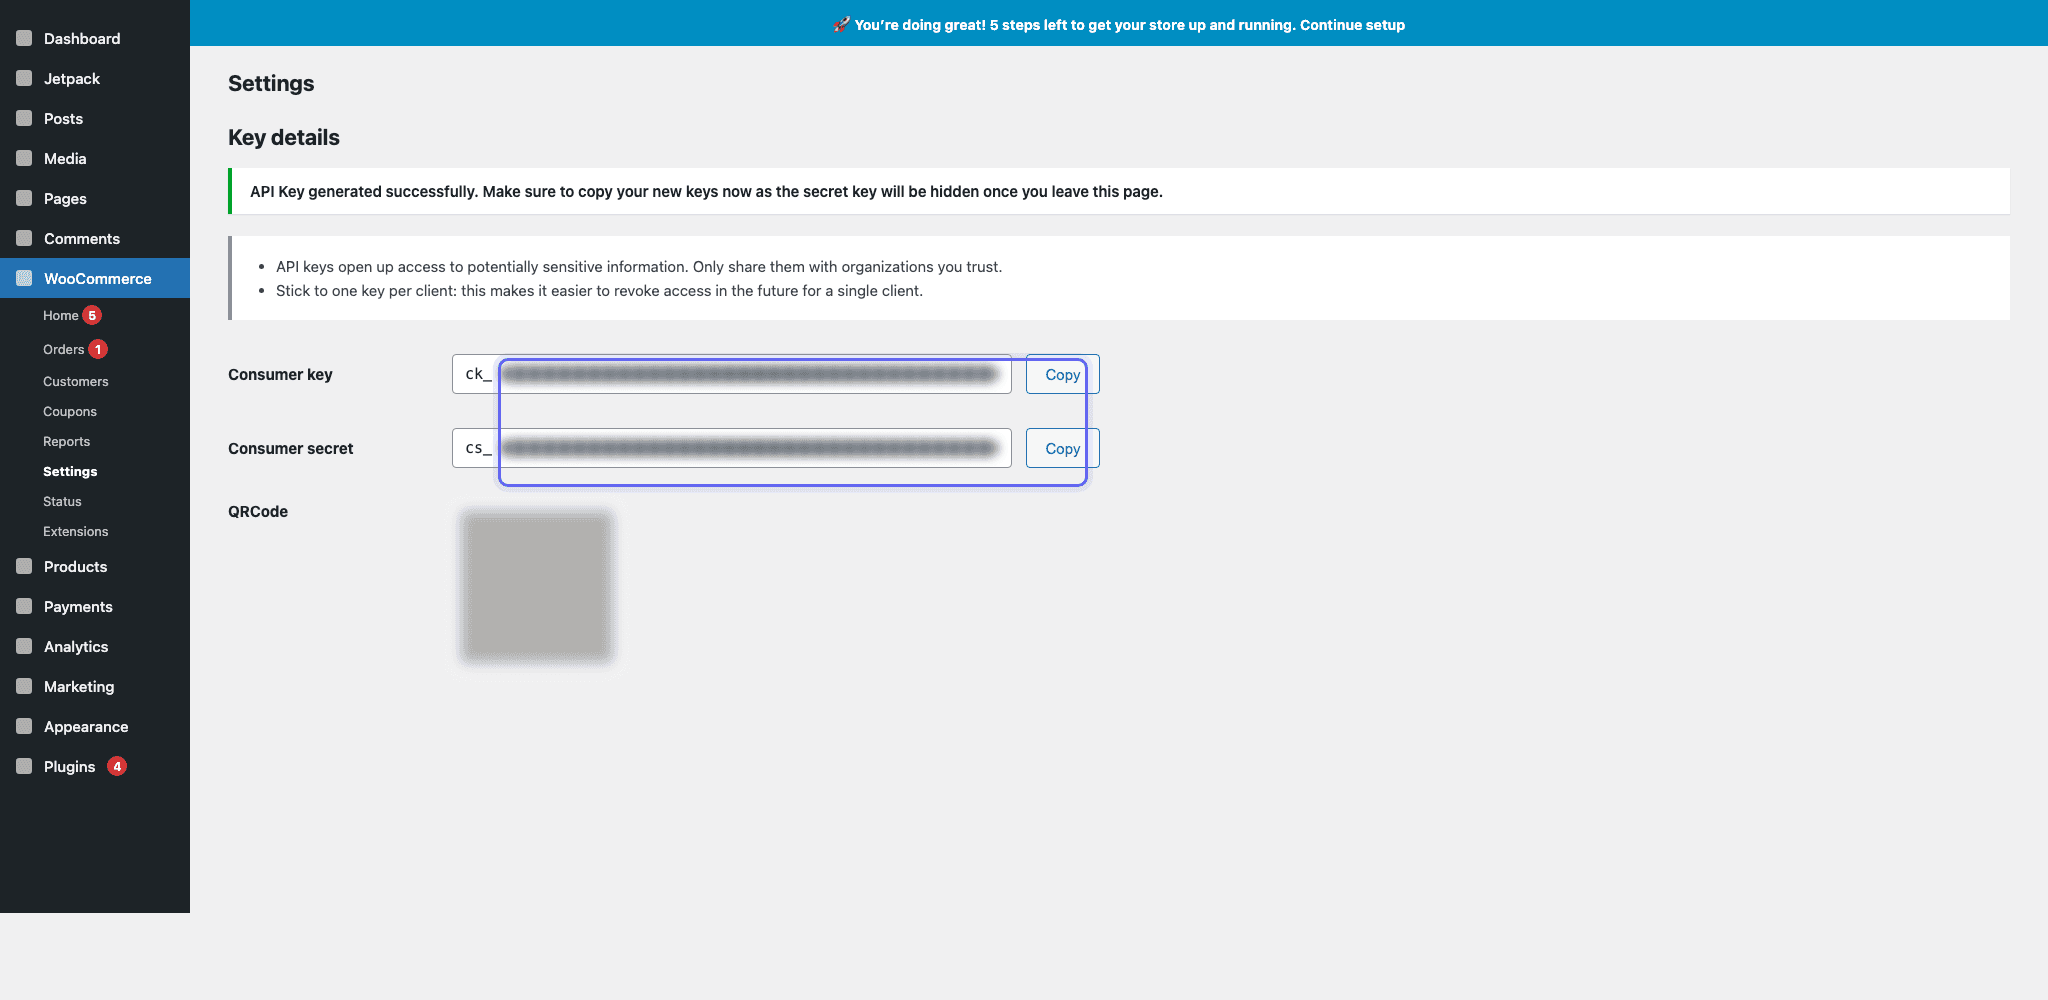
After WooCommerce generates the API key, copy the consumer key and consumer secret immediately. The secret is only shown once, so paste both values into the WooCommerce connection screen in the Aube AI dashboard before leaving the page.
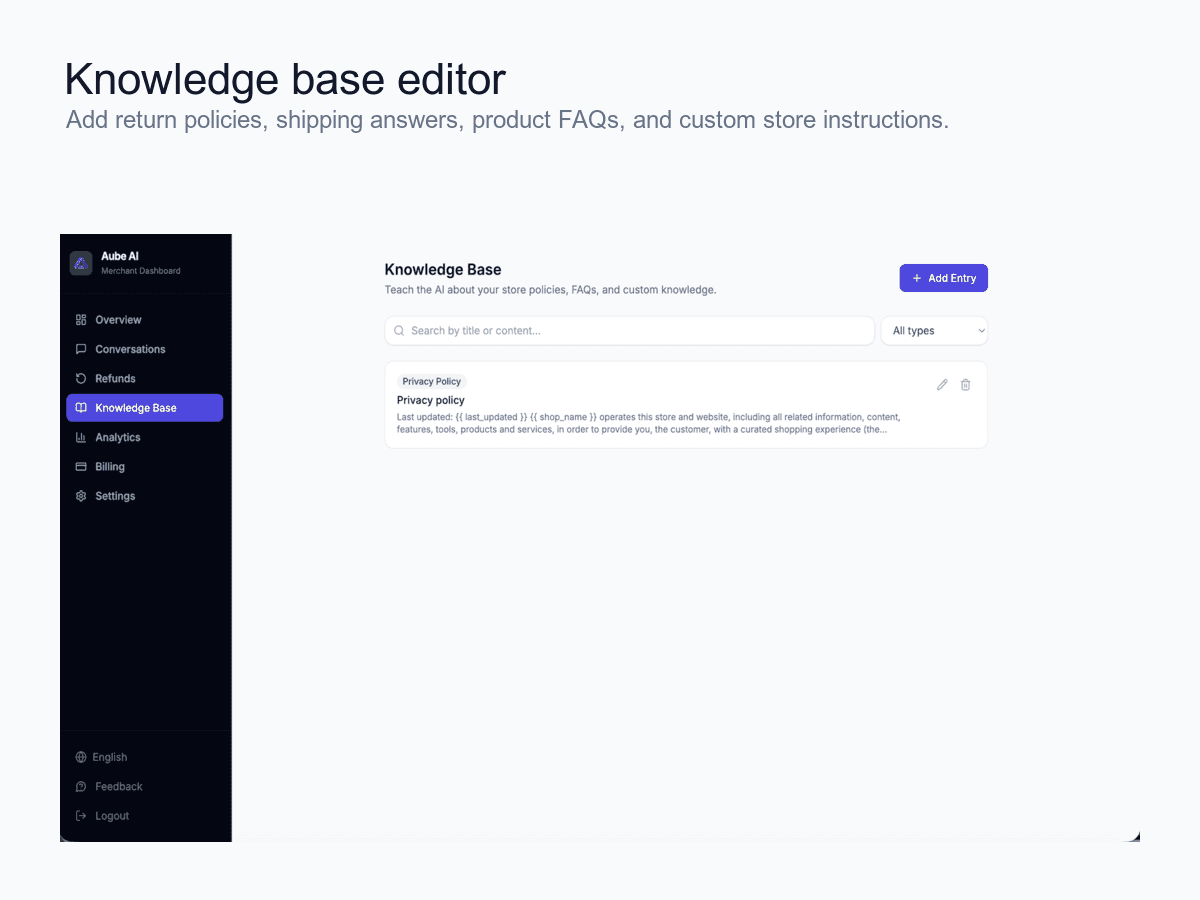
Add your store knowledge
Add FAQs, shipping rules, return policies, sizing details, and product guidance in the Aube AI knowledge base. The chatbot uses this content when answering customers.
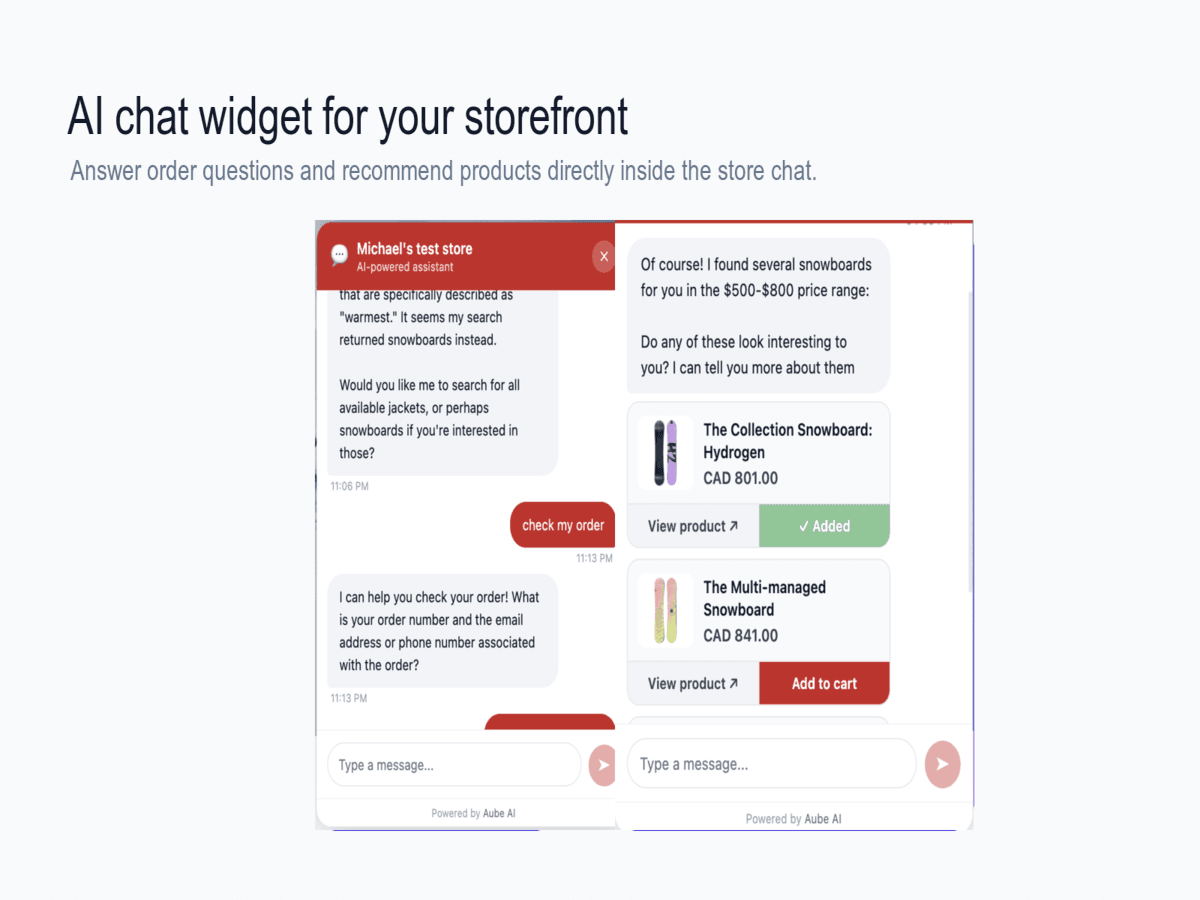
Test the widget as a customer
Open your WordPress site in an incognito window and ask a few common questions. Check that the widget appears, answers in the expected tone, and escalates uncertain questions.
Ready to publish the chatbot?
Create your Aube AI account, connect your store, and test your first customer conversation from the dashboard.
Start with WordPress